
How to add conditional logic to menus in WordPress opens up a world of dynamic menu customization. Imagine menus that adapt to user roles, page visibility, or even custom field values. This guide delves into the power of conditional logic, exploring plugins, custom code, and specific implementation strategies for crafting menus that are tailored to your needs.
We’ll start by understanding the core concept of conditional logic in WordPress menus and its benefits. From there, we’ll explore various methods, including using WordPress plugins, custom code, and specific examples for conditional logic based on user roles, custom post types, and custom fields. The guide will also touch on testing and debugging best practices to ensure your menus function flawlessly.
Introduction to Conditional Logic in WordPress Menus

Conditional logic in WordPress menus allows you to dynamically display or hide menu items based on specific criteria. This flexibility is crucial for tailoring the user experience to different roles and contexts within your website. Instead of creating separate menus for different user groups, conditional logic enables a single menu to adapt to various situations, reducing redundancy and maintaining a clean and organized website structure.This dynamic approach streamlines menu management, saving time and effort.
By using conditional logic, you can create a more personalized and relevant navigation experience for each user, leading to a better overall user experience.
Benefits of Using Conditional Logic
Conditional logic offers several advantages for customizing your WordPress menus. By targeting specific user roles or situations, you create menus that are more relevant to each user, improving navigation and reducing frustration. This leads to a better overall user experience and can boost user engagement.
Common Scenarios for Conditional Logic, How to add conditional logic to menus in wordpress
Conditional logic in menus is invaluable for situations requiring dynamic adjustments. For example, you might want to show different navigation options depending on the user’s role, or display specific menu items based on the visibility of a page. This dynamic approach enables tailored navigation for diverse user groups.
WordPress Menu Structure Example
Imagine a website with different user roles: administrators, editors, and regular users. An administrator needs access to settings, while editors need options for content management. Regular users should only see general information. Without conditional logic, you would need three separate menus. Conditional logic allows a single menu to adjust to the user’s role.
Types of Conditional Logic for Menus
This table illustrates the various types of conditional logic available for WordPress menus, each with specific use cases:
| Type of Condition | Description | Example |
|---|---|---|
| User Role | Show different menus based on user roles. | Admin users see a menu item for settings; regular users do not. |
| Page Visibility | Show or hide menus based on whether a page exists. | Show a menu item if a specific page exists; otherwise, hide it. |
| Custom Field Value | Show or hide menus based on the value of a custom field. | Display a menu item if a custom field has a certain value. |
WordPress Plugins for Conditional Logic
WordPress plugins offer a streamlined approach to implementing conditional logic within menus, eliminating the need for extensive code modifications. These plugins often provide user-friendly interfaces for defining conditions, simplifying the process of tailoring menu items based on user roles, custom fields, or other criteria. This approach significantly reduces the learning curve and allows for quicker implementation, especially for users less familiar with PHP code.Leveraging plugins for conditional logic is advantageous, especially for complex websites with multiple user roles and customized content.
They provide a structured and organized method to dynamically control menu visibility, preventing unnecessary clutter and ensuring the right information is presented to the appropriate users.
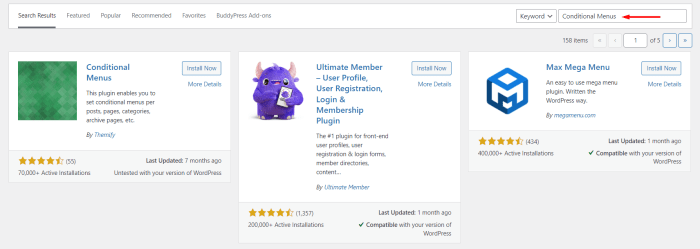
Popular WordPress Plugins
Various plugins facilitate conditional logic in menus. Choosing the right one depends on the specific requirements and complexity of the website. Some popular choices include Menu Builder, Advanced Custom Fields Pro, and others.
Comparison of Plugin Features
A comparison table illustrates the diverse features and functionalities of different plugins, highlighting their strengths and weaknesses, and assisting in selecting the best fit for a project.
Figuring out how to add conditional logic to menus in WordPress can be tricky, but it’s a crucial step for creating dynamic navigation. Often, you need different menus for different user roles, and that’s where it gets interesting. Fortunately, there are plugins and techniques to help, but if your website relies on complex integrations, like those in Salesforce, you might need specialized support from experienced partners like salesforce implementation services with trusted salesforce partners.
Ultimately, the right approach depends on your specific setup, but knowing how to tailor menus for different user groups is key to a smooth user experience in WordPress.
| Plugin Name | Key Features | Pros | Cons |
|---|---|---|---|
| Menu Builder | Provides intuitive menu management with built-in conditional logic based on user roles and other criteria. Offers advanced customization options for menu presentation. | Easy to use interface; robust features for managing menus; readily available support and documentation. | Limited support for custom field-based conditions; might not be ideal for complex logic requirements. |
| Advanced Custom Fields Pro | Focuses primarily on custom fields, but its flexible structure allows for conditional logic in menus through its custom field functionality. The plugin can be powerful, but it requires understanding custom fields. | Exceptional custom field management; highly customizable; potentially integrated with other plugins. | Requires a more technical approach; menu management is not its primary focus; learning curve for custom field usage. |
| WP Menu Manager | Offers a comprehensive menu management system with features for conditional logic based on user roles and custom post types. It provides advanced display options for menus. | User-friendly menu management; allows for a wide range of conditional logic applications; potentially integrated with other plugins. | Potential for higher cost compared to some other options; might have limitations for users with very specific or highly complex needs. |
Installation and Configuration (Example: Menu Builder)
The installation and configuration process typically involve downloading the plugin, activating it, and then using the plugin’s interface to define the desired conditional logic. Menu Builder, for instance, often allows users to create menu items and specify conditions like user roles or post types to control their visibility.
Pricing Models
Plugins often offer various pricing tiers, including free options with limited features and paid options with expanded functionality. The pricing model is crucial when evaluating plugin suitability for a project’s scope. Consider the long-term needs and the balance between features and cost. Some plugins offer a free version with a limited feature set and a paid version with a broader range of functionality.
Others have a one-time purchase model, while some offer subscription-based options.
Custom Code Solutions for Conditional Logic: How To Add Conditional Logic To Menus In WordPress
Adding conditional logic to WordPress menus lets you tailor navigation based on user roles, custom post types, or other criteria. This flexibility allows you to create dynamic and user-specific menus, preventing irrelevant links from appearing for certain users. Custom code provides the most granular control, enabling intricate menu configurations that might not be possible with simpler methods.Custom code solutions offer a high degree of control and allow for complex scenarios.
By directly manipulating WordPress functions, you can precisely manage which menu items appear for specific user groups or circumstances. This gives you unparalleled flexibility in shaping your site’s navigation experience.
Using PHP Functions for Conditional Logic
WordPress offers a rich set of functions for manipulating menus and user roles. Leveraging these functions within custom code allows for the implementation of conditional logic. This direct access allows for greater control over the menu structure and its presentation.
Implementing Conditional Logic with `wp_nav_menu()`
The `wp_nav_menu()` function is crucial for displaying menus in WordPress. You can use it with custom code to create dynamic menus, tailoring the output based on conditions. This powerful function lets you manipulate the menu output based on specific criteria.
Conditional Logic Based on User Roles
You can use the `current_user_can()` function to determine the user’s role and display menu items accordingly. This function checks if the current user has the specified capability. For example, you can show different menus to administrators and regular users. This technique allows you to show or hide menu items depending on the user’s permissions.“`PHP Admin Page
‘; return $items;add_filter(‘wp_nav_menu_items’, ‘my_custom_nav_menu’);?>“`This code snippet adds a link to an admin page only if the user is an administrator.
Conditional Logic Based on Custom Post Types
To conditionally display menu items based on custom post types, you can use `get_post_type()` within a conditional statement. This technique lets you create menu items specific to particular content types.“`PHP Custom Post Type Page
‘; return $items;add_filter(‘wp_nav_menu_items’, ‘my_custom_nav_menu_items’);?>“`This example adds a menu item only when viewing a post of the custom post type “my-custom-post-type.”
Conditional Logic Based on Custom Fields
Using custom fields, you can create dynamic menus based on specific metadata associated with posts. The `get_post_meta()` function is key for retrieving the values of custom fields. This lets you create more targeted menus, tailored to specific post data.“`PHP ID, ‘my_custom_field’, true); if ($my_custom_field_value == ‘show_menu_item’) $items[] = ‘
‘; return $items;add_filter(‘wp_nav_menu_items’, ‘my_custom_nav_menu_items’);?>“`This example displays a menu item if the custom field “my_custom_field” has the value “show_menu_item” for the current post.
Implementing Conditional Logic Based on User Roles
WordPress menus offer a powerful way to tailor navigation for different user groups. Conditional logic allows you to dynamically display or hide menu items based on the logged-in user’s role. This granular control enhances the user experience by presenting only relevant options, preventing confusion, and improving site efficiency.Implementing this logic streamlines the user interface, making it more intuitive and user-friendly.
It ensures that only authorized users see specific menu options, thus reinforcing site security and maintaining data integrity. This also reduces the cognitive load on users by presenting them with only the options pertinent to their role.
Modifying WordPress Menus Based on User Roles
To modify WordPress menus based on user roles, you leverage the `current_user_can()` function. This function checks if the current user possesses a specific capability or role. By combining this function with conditional statements, you can programmatically determine whether a menu item should be displayed.
Using the `current_user_can()` Function
The `current_user_can()` function is fundamental to conditional logic in WordPress menus. It accepts a capability string as an argument. If the current user has the specified capability, the function returns `true`; otherwise, it returns `false`. This boolean output allows you to control menu visibility based on user roles. For example, `current_user_can(‘administrator’)` checks if the current user is an administrator.
Hiding or Showing Menu Items for Specific User Roles
The core principle of hiding or showing menu items is to place the conditional logic within the `wp_nav_menu()` function’s `menu_class` or `menu_id` attributes, or within the `wp_nav_menu()` callback. This dynamic approach enables different navigation structures for different user roles.
Code Example for Conditional Logic
“`PHP ‘primary’, ‘container’ => false, ‘items_wrap’ => ‘
Ever wanted to tailor your WordPress menu based on user roles? Adding conditional logic to menus is a surprisingly powerful tool, especially when you’re starting to think about how to leverage digital marketing strategies for scaling your business. Digital marketing strategies for scaling your business often involve reaching different user segments, and dynamic menus can help you achieve that.
For example, a different menu could appear for logged-in customers versus guests. This functionality will help you optimize your site navigation for maximum user engagement and ultimately increase conversions.
- %3$s
‘, ‘walker’ => new Walker_Nav_Menu() ); if (current_user_can(‘administrator’)) $args[‘menu_class’] = ‘admin-menu’; // add admin-menu class to the list if the user is admin elseif(current_user_can(‘editor’)) $args[‘menu_class’] = ‘editor-menu’; // add editor-menu class to the list if the user is editor else $args[‘menu_class’] = ‘user-menu’; // add user-menu class to the list if the user is a normal user wp_nav_menu($args);add_action(‘wp_nav_menu_items’, ‘my_custom_menu’);?>“`This code snippet demonstrates how to apply conditional logic to the WordPress menu. It dynamically assigns classes to the menu based on the user’s role. This approach is flexible and adaptable to various menu display needs.
Table of User Roles and Visible Menu Items
| User Role | Menu Items Visible |
|---|---|
| Administrator | Settings, Reports, Users |
| Editor | Posts, Pages, Comments |
| Author | Posts, Pages |
This table illustrates the straightforward correlation between user roles and the corresponding menu items they can access. This clear mapping ensures a targeted and user-specific navigation experience.
Implementing Conditional Logic Based on Custom Post Types
Adding conditional logic to WordPress menus based on custom post types allows dynamic menu structures tailored to specific content. This is particularly useful for creating specialized navigation for users, or displaying menus based on the available content. This approach offers a more refined and responsive user experience, making your WordPress site more engaging and easier to navigate.Dynamically generating menu items based on custom post types enhances the overall site structure, adapting to changes in content.
This method empowers you to tailor navigation based on the specific content currently available on your site, providing a more refined user experience.
Creating Custom Menus Based on Custom Post Types
To create custom menus based on the existence of custom post types, you need to utilize functions that check for the presence of these post types. This allows you to add menu items only when the corresponding post type exists. This dynamic approach ensures that your menus are always relevant to the content your site displays.
Using `get_post_type()` and `post_type_exists()`
The `get_post_type()` function retrieves the name of a post type. This function is crucial for identifying the specific custom post type. The `post_type_exists()` function verifies whether a given post type exists in the WordPress installation. This function provides a boolean value, enabling efficient conditional logic based on the existence of custom post types. These functions, combined, provide the foundation for adding menu items only when the necessary post types are present.
Demonstrating Dynamic Addition of Menu Items
Conditional logic allows you to dynamically add menu items based on the existence of specific custom post types. This flexibility enhances the navigation experience by displaying only relevant options.
Comprehensive Example: Adding Menu Items Related to Custom Post Types
This example demonstrates adding menu items related to custom post types.“`php “`This code snippet checks for the existence of ‘my_custom_post_type’ and ‘another_custom_post_type’. If either post type exists, it adds a corresponding menu item. Replace placeholders like `’my_custom_post_type_menu_url’` with the actual URLs and other necessary data. Remember to register your custom post types before using this code.
Implementing Conditional Logic Based on Custom Fields
Adding custom fields to your WordPress posts or pages allows you to store specific data relevant to each item. This data can be invaluable for tailoring the user experience. Imagine a website with different types of products, each with varying features or pricing tiers. Using custom fields, you can store this product-specific data and then use conditional logic to dynamically display menu items based on those attributes.
This method gives you a highly targeted and user-friendly navigation experience.Custom fields, combined with conditional logic, offer powerful tools for creating dynamic menus. They empower you to create menus that are personalized to each user based on their specific needs and roles. This flexibility allows for a more tailored and intuitive user interface. For example, a user with a specific role might need to see different menu items than a standard user.
Custom fields and conditional logic allow you to cater to these varied requirements.
Using the `get_field()` Function
The `get_field()` function is the cornerstone of accessing custom field data within your WordPress theme or plugin. It’s crucial for retrieving the values stored in your custom fields. This function is specifically designed for retrieving data from custom fields, simplifying the process of data retrieval and enabling flexible conditional logic in menu creation. This is vital for avoiding hardcoding and for creating a scalable and maintainable menu system.
Dynamically Creating Menu Items Based on Custom Field Values
To create menu items based on custom field values, you need to integrate the `get_field()` function with the WordPress menu API. The key is to use the results of `get_field()` to determine whether a menu item should be displayed. This allows you to tailor menu options based on user roles, post types, or custom field values, resulting in a highly personalized and user-friendly experience.
This approach is flexible and easily adaptable to various menu structures and website needs.
Code Example
“`php ID ); if ( $menuVisibility == ‘show’ ) $menu_item = array( ‘title’ => ‘Custom Menu Item’, ‘url’ => get_permalink(), ‘attr’ => array( ‘class’ => ‘custom-menu-item’, ), ); $items[] = (object) $menu_item; return $items; ?>“`This code snippet demonstrates a crucial technique.
It uses the `wp_nav_menu_items` filter to add a dynamic menu item. Crucially, it checks the value of the custom field ‘menu_visibility’ and adds the item only if the value is ‘show’. This ensures the menu item appears only when the corresponding custom field value matches the condition. The use of `has_action` and `is_admin()` prevents unintended side effects in administrative areas.
Testing and Debugging Conditional Logic
Getting conditional logic right in WordPress menus is crucial for a smooth user experience. Incorrectly implemented conditional logic can lead to frustrating issues for your users, making the menu unusable or even causing unexpected behavior elsewhere in your website. Thorough testing and debugging are vital to avoid these problems.Implementing conditional logic requires careful consideration of user roles, post types, custom fields, and other factors.
Errors can stem from mismatched conditions, incorrect field names, or typos in your code. Having a systematic approach to testing and debugging will save you time and headaches in the long run.
Figuring out how to add conditional logic to menus in WordPress can be tricky, but it’s a crucial step for any site with varying user roles. You need to tailor your navigation to specific users, right? This is where things get interesting. It’s easy to fall into the trap of the “big solopreneur lie,” believing you can do everything yourself and neglecting the need for efficient systems.
Instead, learn how to leverage plugins and techniques to streamline your site’s functionality, like using conditional logic in your menu. This is a key part of keeping your site organized and user-friendly, much like the essential strategies outlined in the big solopreneur lie. A well-structured menu with conditional logic is a cornerstone of any successful WordPress site.
Common Issues in Conditional Logic Implementation
Incorrectly written conditions are a common pitfall. Mismatched or missing conditions will cause the menu to display incorrectly or not at all. For instance, a condition checking for a user role that isn’t present or a custom field that doesn’t exist will lead to unpredictable results. Also, subtle syntax errors, such as missing semicolons or incorrect operators, can lead to significant bugs.
Debugging and Troubleshooting Tips
First, thoroughly review your conditional logic code for any syntax errors. Use a debugging tool within your IDE to step through the code, checking the values of variables and ensuring the conditions are evaluated as expected. Console logs in your browser can provide valuable insights into the execution flow and variable states. Actively check for unexpected values or types of variables in your conditions.
For instance, a string compared to an integer can lead to surprising results.
Importance of Thorough Menu Testing
After implementing conditional logic, it’s essential to test the menu thoroughly in various scenarios. This involves testing different user roles, custom post types, and custom fields to ensure that the menu items appear and disappear as expected. Failing to do so can lead to critical issues where parts of your menu are inaccessible to certain users, which can create a frustrating user experience and impact the overall functionality of your site.
Practical Steps for Testing Conditional Logic
- Test with Different User Roles: Create users with different roles (administrator, editor, author, subscriber, etc.) and navigate to the menu to see if items are displayed correctly for each role. This ensures that the menu is behaving as intended for each user group.
- Test with Different Post Types: If your conditional logic depends on post types, create sample posts of various types and check that menu items are shown or hidden appropriately based on the post type. Consider posts from custom post types if applicable.
- Test with Custom Fields: If your conditional logic depends on custom fields, create posts with different values in those fields and verify that the menu adapts accordingly. Ensure all possible combinations of field values are tested. For example, check cases with empty fields and fields with different data types.
- Use Browser Developer Tools: Inspect the menu’s HTML structure in your browser’s developer tools to visually confirm the presence or absence of menu items. This can help quickly identify if the logic is failing to update the menu properly.
Using a Plugin for Testing
A plugin specifically designed for testing menu functionality can streamline the process. These plugins might allow you to simulate user roles or quickly create test posts for different scenarios, simplifying the debugging process.
Logging for Debugging
Implementing logging in your conditional logic code can help trace the flow of execution and identify where the logic is failing. This is a crucial step in isolating the exact cause of the problem. Log critical values to help pinpoint the issue quickly.
Security Considerations for Conditional Logic
Implementing conditional logic in WordPress menus can enhance user experience, but it also introduces potential security vulnerabilities if not handled carefully. Carefully considering security implications is crucial to protect your website and user data. This section explores potential risks and best practices for secure implementation.WordPress, like many dynamic content management systems, is susceptible to attacks if vulnerabilities are not addressed.
Conditional logic, when improperly implemented, can expose sensitive data or allow malicious users to manipulate the menu structure, potentially leading to unauthorized access or other security breaches.
Potential Security Risks
The most significant security risks stemming from poorly implemented conditional logic in WordPress menus involve user input vulnerabilities. If user input is not properly sanitized and validated, attackers can inject malicious code or manipulate menu structures to gain unauthorized access. Incorrect handling of user roles or permissions can also result in undesired privileges, allowing attackers to access features not intended for them.
Best Practices for Avoiding Vulnerabilities
Securely handling user input is paramount. Always use WordPress’s built-in sanitization and validation functions to prevent injection attacks. These functions are designed to remove or escape potentially harmful characters from user-supplied data, protecting your site from cross-site scripting (XSS) and SQL injection attacks. Never trust user input directly; always validate and sanitize it.
- Input Validation: Thoroughly validate user input to ensure it conforms to expected formats and ranges. For example, if a field expects a numerical value, ensure that the input is actually a number and not something else.
- Sanitization: Use WordPress’s `esc_attr()` or similar functions to sanitize user input before using it in HTML attributes. This helps prevent XSS vulnerabilities. Sanitize all user inputs that will be displayed or used in any way in your theme or plugin code.
- Regular Expression Validation: For complex validation requirements, use regular expressions to validate user input more precisely, ensuring only specific characters are allowed. This is particularly useful for fields where format is critical.
Secure Handling of Sensitive Data
Handling sensitive data within conditional logic requires extra caution. Never store sensitive information directly in the menu structure or conditional logic code. Use secure methods for handling such data, such as database queries with appropriate security measures.
- Database Security: Store sensitive data in a secure database table, using appropriate encryption and access controls. Never expose sensitive data directly in your menu structures or conditional logic code.
- Password Security: If your conditional logic depends on user passwords, ensure you use WordPress’s built-in password handling mechanisms and avoid storing passwords directly in your code.
- User Role Management: Implement proper user role management. Restrict access to sensitive functionalities based on predefined user roles and capabilities. Limit the access of users to only the functions that they need to execute.
Sanitizing and Validating User Input
Validating and sanitizing user input is crucial for preventing vulnerabilities like XSS and SQL injection attacks. This process involves meticulously checking the format and content of data submitted by users.
- Use WordPress Sanitization Functions: Utilize functions like `esc_html()`, `esc_url()`, and `esc_attr()` to sanitize data intended for different contexts (HTML, URLs, attributes). These functions are critical for preventing XSS attacks.
- Custom Validation: Create custom validation rules for specific data types (numbers, dates, etc.) using regular expressions or other methods. Ensure that input adheres to predefined rules and ranges.
- Input Filtering: Filter user input to remove potentially harmful characters or patterns. Regular expressions can be helpful in this regard, but use them cautiously to avoid unexpected results.
Final Review
Mastering conditional logic in WordPress menus empowers you to create highly customized and dynamic navigation experiences. Whether you opt for plugins or custom code, the key is understanding the principles behind conditional statements and how they interact with WordPress functions. By following the examples and best practices Artikeld in this guide, you’ll be well-equipped to tailor your WordPress menus to any scenario, ensuring a seamless and user-friendly experience for your website visitors.