
How to create an alert bar in WordPress? This guide dives deep into the world of visual feedback for your website visitors. Alert bars, those helpful little messages that pop up to notify users about actions, are a crucial part of a good user experience. Whether it’s a successful form submission, an error message, or a simple warning, alert bars enhance site usability and make your WordPress site more user-friendly.
We’ll explore various methods, from simple CSS to dedicated plugins, to help you craft the perfect alert bar for your site.
This comprehensive guide will walk you through creating visually appealing and functional alert bars within your WordPress site. We’ll cover everything from basic implementation to advanced customization options, ensuring your alert bars are not only informative but also seamlessly integrated into your WordPress design.
Introduction to Alert Bars in WordPress
Alert bars are crucial visual elements in WordPress websites, providing immediate feedback to users about actions they’ve taken or information presented to them. They serve as a concise and effective way to communicate important messages, notifications, or confirmations without disrupting the user’s flow through the website. Their prominent display ensures critical information is easily noticed, enhancing the overall user experience.Alert bars are designed to draw attention to specific information, whether it’s a successful upload, an error message, or a warning about potential issues.
They typically appear temporarily, fading away after a short period or requiring user interaction to dismiss. This helps to avoid cluttering the page and maintain a clear and organized layout.
Types of Alert Bars
Alert bars come in different styles to convey distinct messages. Common types include:
- Success Alert Bars: These bars visually indicate a successful action, such as a completed form submission, file upload, or data update. They typically feature a green or blue background and a positive message.
- Error Alert Bars: These alert bars signal an error or problem, such as an invalid input, a failed upload, or a database issue. They typically use a red or orange background and a clear error message.
- Warning Alert Bars: These bars indicate a potential problem or cautionary information. For instance, a warning might highlight a user’s pending account activation or a forgotten password. They usually feature a yellow or orange background and a cautionary message.
Use Cases for Alert Bars
Alert bars offer versatility in various WordPress contexts. They are not just for error messages but also facilitate effective communication with users:
- User Feedback: Alert bars provide immediate feedback on actions, such as confirming a user’s registration, updating their profile, or submitting a comment. This immediate feedback greatly enhances the user experience.
- Notifications: Alert bars can notify users about new comments, pending approvals, or system updates. This ensures users are aware of important information without requiring constant refreshing.
- Important Messages: Alert bars effectively highlight crucial information or instructions to users. For instance, they could display notices about system maintenance or security updates.
Basic HTML Table Structure for Alert Bars
The following table illustrates a basic HTML structure for a typical alert bar. This structure can be adapted to various types and styles:
| Alert Type | Message |
|---|---|
| Success | File uploaded successfully! |
| Error | Error uploading file. Please check file type. |
| Warning | Your account activation is pending. Check your email. |
Methods for Creating Alert Bars
Alert bars, also known as notification bars, are crucial for providing users with timely and important information on a WordPress website. They can highlight updates, errors, success messages, or other critical notices, enhancing user experience and guiding actions. Implementing them effectively requires careful consideration of design and functionality.Different approaches exist for incorporating alert bars into your WordPress site, each with its own set of advantages and disadvantages.
Understanding these methods allows you to select the best approach for your specific needs and technical expertise.
Custom CSS
Custom CSS offers complete control over the appearance of alert bars, allowing you to precisely tailor the design to match your theme’s aesthetics. You can adjust colors, fonts, and other visual elements. However, managing the CSS can be complex, requiring familiarity with CSS principles and potential conflicts with theme styles. Also, maintaining the code for numerous alert bar styles across various pages can become a significant undertaking.
JavaScript
JavaScript enables dynamic alert bars, which can appear and disappear based on specific events or conditions. This flexibility makes it ideal for displaying notifications based on user actions, data changes, or AJAX requests. A downside is that integrating JavaScript requires a degree of programming knowledge, potentially impacting website performance if not optimized properly.
WordPress Plugins
WordPress plugins provide a streamlined way to implement alert bars without extensive coding. They often offer pre-designed templates and customizable options, making setup quicker and easier. However, plugins may add extra functionality that you might not need, potentially slowing down your site. Also, you’re dependent on the plugin’s maintenance and updates.
Using a JavaScript Library
A simple JavaScript library can simplify the process of adding alert bars. Libraries like SweetAlert2 offer pre-built components for creating visually appealing and functional alert bars.
Example Using SweetAlert2
“`javascript// Include the SweetAlert2 library in your theme’s JavaScript file.// …// Example alert bar for a successful actionfunction showSuccessAlert() Swal.fire( icon: ‘success’, title: ‘Success!’, text: ‘Your action was successful.’, confirmButtonColor: ‘#3085d6’, timer: 3000 // Automatically closes after 3 seconds );// Example alert bar for an errorfunction showErrorAlert(errorMessage) Swal.fire( icon: ‘error’, title: ‘Error!’, text: errorMessage, confirmButtonColor: ‘#d33’, timer: 3000 // Automatically closes after 3 seconds );“`This JavaScript code demonstrates how to use SweetAlert2 to create an alert bar that displays a success message.
The example showcases the structure for a success message and an error message. You can customize the `title`, `text`, and `timer` parameters to meet your specific needs.
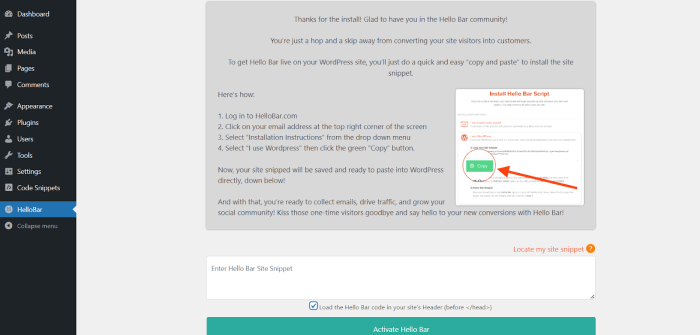
Using a WordPress Plugin
The “WP Alert Bar” plugin is one example that provides a straightforward way to add alert bars. This plugin provides a user-friendly interface for creating, styling, and managing your alert bars without writing code. The plugin usually has options for various alert types, colors, and durations, simplifying the process.
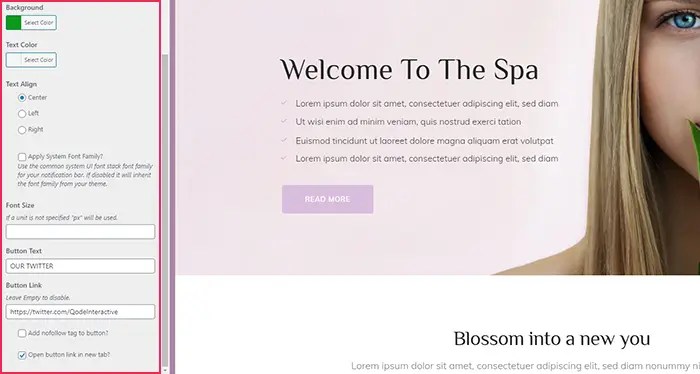
Customizing Alert Bar Styles
Alert bars, crucial for providing immediate feedback to users, are more effective when visually distinct. This section delves into customizing their appearance, offering various styling options to create a seamless user experience. From vibrant colors to easily readable fonts, customization empowers you to tailor alert bars to your website’s design.Customizing alert bar styles enhances user engagement by providing clear and visually appealing notifications.
By adjusting colors, fonts, and sizes, you can create a consistent brand identity and make alert bars more noticeable. This not only improves the user interface but also contributes to a more user-friendly experience.
Color Customization
Alert bars can be visually distinguished by assigning specific colors to different types of alerts. This enhances user comprehension by immediately conveying the nature of the message (e.g., success, error, warning). Employing a color palette that aligns with your website’s color scheme will maintain visual harmony.
- Success alerts can be displayed in a green shade, while error alerts might use red. Warning alerts can utilize a yellow or orange hue.
- Consider using shades of the primary colors for alerts to enhance brand consistency.
- For high contrast and accessibility, ensure sufficient color contrast between the alert background and text. Use tools to verify color contrast compliance.
Font and Size Customization
Font and size adjustments are critical for readability. A legible font and appropriate size ensure users can easily understand the alert’s message. This directly impacts user experience and allows them to quickly grasp the presented information.
- Select a font that is easily readable at various screen sizes. Sans-serif fonts are often a good choice for clarity.
- Adjust the font size to ensure the alert’s text is visible without being overwhelming. Consider different screen sizes when determining the ideal font size.
- Use a font weight that clearly stands out from the surrounding content, but does not appear overly bold.
CSS Class-Based Styling
Using CSS classes to style alert bars promotes code maintainability and organization. This method allows you to easily modify the appearance of various alert types without impacting other elements. This approach ensures that your code is structured and reusable.“`CSS.success-alert background-color: lightgreen; color: darkgreen; padding: 15px; border-radius: 5px;.error-alert background-color: lightcoral; color: darkred; padding: 15px; border-radius: 5px;.warning-alert background-color: lightyellow; color: darkorange; padding: 15px; border-radius: 5px;“`
Responsive Design Considerations
Responsive design is crucial for a positive user experience across various devices. Alert bars should adapt to different screen sizes and resolutions. This ensures consistent presentation and readability.
| Device | Font Size | Padding | Width |
|---|---|---|---|
| Desktop | 16px | 20px | 300px |
| Tablet | 14px | 15px | 250px |
| Mobile | 12px | 10px | 200px |
Adding Interactivity to Alert Bars
Alert bars, while useful for conveying important information, can be enhanced significantly by incorporating interactivity. Adding features like dismiss buttons and animations improves user experience by making the alert more engaging and less intrusive. Users appreciate the ability to quickly dismiss messages that are no longer relevant, and smooth animations enhance the visual appeal of the alert bar.Interactivity elevates the alert bar from a simple notification to a dynamic element that actively responds to user engagement.
Dismissing the bar with a button, for example, is a clear action that removes the notification when appropriate, preventing the user from feeling overwhelmed by persistent messages.
Dismiss Buttons with JavaScript, How to create an alert bar in wordpress
Adding a dismiss button allows users to proactively close the alert bar. This is a crucial aspect of user experience, as persistent alerts can be distracting. Using JavaScript, you can create a button that effectively removes the alert from the page.
The JavaScript code handles the click event on the dismiss button, using a function to remove the alert bar from the DOM (Document Object Model). This approach ensures the alert is completely removed, not just hidden.
Creating Dismiss Buttons Using JavaScript
The following code snippet demonstrates a clickable dismiss button within an alert bar. This example uses a simple HTML structure, JavaScript to create the button, and event listeners to control its behavior.
<div class="alert">
  <span class="message">This is an important alert!</span>
  <button class="dismiss">Dismiss</button>
</div>

<script>
const alertDiv = document.querySelector('.alert');
const dismissButton = document.querySelector('.dismiss');

dismissButton.addEventListener('click', () =>
  alertDiv.remove();
);
</script>
Adding Animations to Alert Bars
Animations can improve the visual appeal of alert bars and make them more engaging. Transitions like fade-ins or slide-ins can enhance the user experience and draw attention to important messages. CSS transitions are a powerful tool for achieving smooth animations.
For example, using CSS transitions on the alert bar’s opacity or position can create subtle, but noticeable, visual effects. Careful selection of animation duration and timing function ensures the animation feels natural and doesn’t disrupt the user’s workflow.
Handling Different Alert Types
Alert bars aren’t just for generic notifications; they can convey different levels of importance. This section delves into creating distinct alert types—success, error, and warning—each with its own visual cues and behavior. Customizing these alerts enhances user experience by providing clear feedback on actions taken.Different alert types require tailored visual presentation and behavior to communicate specific information effectively.
A success message should feel celebratory, an error message should be clear and actionable, and a warning message should signal potential issues without causing alarm. By carefully considering the visual design and behavior of each type, you can enhance user understanding and ensure smooth interactions with your WordPress site.
Creating an alert bar in WordPress is surprisingly straightforward. You can use plugins to quickly add a banner to your site for important announcements or promotions. This is useful for everything from site updates to special offers, but the world of generative AI in e-commerce world of generative ai in e commerce is opening up exciting possibilities.
Imagine AI-powered alert bars dynamically adjusting based on user behavior, suggesting products they might like or offering personalized discounts. It’s a fascinating space, but the fundamental techniques for building basic alert bars remain crucial for a solid foundation.
Alert Type Differentiation
Alert bars for success, error, and warning should use distinct styling to communicate the nature of the message. A success alert, for instance, should be visually appealing and reinforcing, whereas an error alert should be clearly highlighted as an issue needing attention. Warning alerts should fall somewhere in the middle, visually distinct but not as severe as error alerts.
Visual Cues for Different Alert Types
The visual cues employed for each alert type are critical to conveying the message’s meaning. Success alerts should use colors and icons that evoke positivity and completion. Error alerts should be bold and easily noticeable to immediately highlight problems. Warning alerts should stand out from the surrounding content but not be as dramatic as error alerts. This nuanced approach is key to user comprehension.
Code Examples for Displaying Different Alert Types
These examples demonstrate how to create alerts with specific visual attributes for success, error, and warning using CSS classes. Note the flexibility in adding icons and adjusting the styling based on your design.“`HTML
“““CSS.alert padding: 15px; margin-bottom: 10px; border-radius: 5px; box-shadow: 2px 2px 5px rgba(0, 0, 0, 0.1);.alert-success background-color: #d4edda; color: #155724;.alert-error background-color: #f8d7da; color: #721c24; border: 1px solid #f5c6cb;.alert-warning background-color: #fff3cd; color: #856404; border: 1px solid #ffeeba;.alert-icon margin-right: 10px; font-size: 1.2em;“`
Comparison Table of Alert Types
This table summarizes the design and styling attributes for success, error, and warning alert bars.

Creating an alert bar in WordPress is surprisingly straightforward. You’ll need to use a bit of CSS and perhaps a plugin for more advanced options. However, when dealing with larger projects, like migrating your data from one system to another, such as in data migration in salesforce ensuring seamless transitions , the focus shifts to ensuring a smooth and effective transition.
Ultimately, mastering the alert bar in WordPress will help you keep your users informed and engaged.
| Alert Type | Background Color | Text Color | Icon/Symbol |
|---|---|---|---|
| Success | Light Green (#d4edda) | Dark Green (#155724) | ✅ (Checkmark) |
| Error | Light Pink (#f8d7da) | Dark Red (#721c24) | ❌ (Cross) |
| Warning | Light Yellow (#fff3cd) | Dark Orange (#856404) | ⚠️ (Exclamation Triangle) |
Alert Bar Accessibility Considerations
Alert bars, while visually appealing, must be designed with accessibility in mind. Failing to consider users with disabilities can lead to frustration and exclusion. Ensuring accessibility means crafting alert bars that are usable by everyone, regardless of their abilities. This includes users with visual impairments, cognitive differences, and other disabilities.Alert bars are often used to provide immediate feedback or critical information.
However, if not designed properly, they can be a barrier to users with disabilities. The most critical aspects of accessible alert bars revolve around clear communication, effective use of visual cues, and the implementation of alternative solutions for those with visual impairments.
Color Contrast
Effective color contrast is crucial for users with visual impairments, particularly those with low vision or color blindness. Alert bars should use colors that have sufficient contrast ratio to ensure readability. This is not just about making the text visible; it’s about making the message understandable. Tools are available to calculate contrast ratios and ensure compliance with accessibility guidelines.
Want to add a snappy alert bar to your WordPress site? It’s surprisingly straightforward! First, you’ll need a good plugin, and then you can style it to match your theme. However, if you’re looking to present your data effectively, understanding the nuances of data visualization is crucial, like how best to present your data, especially when considering different methods for displaying it.
For example, you could explore data visualization vs data modeling techniques to optimize the way your data is presented to the audience. Data visualization vs data modeling is a crucial aspect of effectively communicating information. Then you can use the alert bar to highlight important updates or crucial information to users, and continue to optimize your site for clarity and engagement.
For example, a ratio of 4.5:1 is often required for normal text, while a higher ratio may be necessary for alert bars due to their importance.
ARIA Attributes
ARIA (Accessible Rich Internet Applications) attributes are crucial for providing alternative information to assistive technologies like screen readers. These attributes allow screen readers to accurately convey the content and purpose of the alert bar to users with visual impairments. By using ARIA roles, states, and properties, you can significantly enhance the accessibility of your alert bars. For instance, using the `aria-live` attribute can inform screen readers when the alert bar’s content changes, allowing users to be immediately aware of important updates.
Alternative Text
Alternative text, or `alt` text, should describe the content and purpose of the alert bar. This is particularly important for alert bars that might not be easily understood by a screen reader. When providing `alt` text, focus on the message and action the user should take. For example, if an alert bar indicates a successful file upload, the `alt` text should convey that success and the next step.
Best Practices for Accessible Alert Bars
- Use sufficient color contrast between the alert bar’s background and text. Ensure compliance with accessibility guidelines, such as WCAG (Web Content Accessibility Guidelines).
- Employ ARIA attributes, such as `aria-live`, `aria-describedby`, and `role=”alert”` to describe the alert bar’s purpose and state to assistive technologies.
- Include descriptive alternative text (`alt` text) for any non-textual elements within the alert bar, such as icons or images. The alt text should convey the purpose of the element.
- Avoid using color alone to convey important information. Always use text or symbols to reinforce the message.
- Test alert bars with assistive technologies like screen readers to ensure they are accessible to users with visual impairments.
- Consider using a visual indicator, such as a different icon or color, to denote different alert types (success, warning, error) to improve understanding for users with disabilities.
Integrating Alert Bars with Existing WordPress Functions: How To Create An Alert Bar In WordPress
Alert bars are more effective when seamlessly integrated into WordPress’s existing workflows. This allows for dynamic feedback and user notifications that are contextually relevant to actions performed within the platform. By linking alert bars to specific functions, such as form submissions or data updates, you enhance the user experience and provide immediate confirmation of actions.Integrating alert bars with WordPress functions involves hooking into the relevant action points and displaying the alert bar based on the results of those actions.
This approach ensures the alert bar appears precisely when needed, without cluttering the interface with unnecessary notifications.
Triggering Alert Bars Based on Specific Actions
To integrate alert bars with WordPress functions, you need to identify the specific actions or events that trigger the alert’s display. These actions could include form submissions, data updates, or even custom actions triggered by plugins. Hooks are essential tools for this integration. They allow you to add your custom alert bar functionality to existing WordPress processes without modifying the core code.
Displaying Alert Bars Upon Successful Form Submissions
A common use case involves displaying an alert bar after a successful form submission. This confirmation reinforces user actions and prevents confusion. This approach provides instant feedback to the user, improving their experience and reducing frustration.
- Identify the form submission action. This often involves using a WordPress hook such as `wp_insert_post` or `wp_insert_comment` for post submissions or comments. Knowing the specific hook allows you to target the action where the alert bar should appear.
- Within the hook’s callback function, check for the success of the submission. If the submission is successful, proceed with displaying the alert bar. This often involves checking for error messages or specific data from the form. Use conditional statements to evaluate whether the form was submitted successfully.
- Display the alert bar using the chosen method, whether it’s a custom function or a plugin. Include the necessary content within the alert bar to indicate success and include specific information, like the submitted data or a success message.
Displaying Alert Bars Upon Data Updates
Similarly, alert bars can confirm successful data updates. This is crucial for tasks like user profiles, product details, or other data modifications.
- Determine the relevant WordPress hook that handles data updates. This might be a custom function or an action triggered by a plugin.
- Use conditional statements within the hook’s callback function to ascertain whether the data update was successful. This is critical to ensure the alert bar displays only when the update completes without errors.
- Construct the alert bar content to communicate the update’s success. This could include a success message, updated data, or a summary of the changes made. Consider the specific context of the data update and tailor the alert bar content accordingly.
Example: Alert Bar Triggering within a Custom WordPress Function
This example demonstrates how to display an alert bar within a custom WordPress function when a user submits a contact form.“`PHPfunction display_contact_form_alert($form_data) // Check for form submission success. if (isset($form_data[‘success’]) && $form_data[‘success’] === true) // Construct the alert bar content. $alert_content = ‘
‘; // Display the alert bar. Replace with your preferred display method. echo $alert_content; “`This example demonstrates a simple scenario. More complex scenarios might require additional checks and error handling.
Final Wrap-Up
In conclusion, crafting effective alert bars in WordPress involves understanding user needs, employing the right tools, and meticulously customizing the visual experience. From simple implementation to advanced interaction, this guide has equipped you with the knowledge to create informative and engaging alert bars that elevate your WordPress site’s user experience. Remember to consider accessibility and design choices for a positive impact.